f you’ve been scrolling through foodie videos or grilling forums lately, chances are you’ve heard of smash burger balls—the juicy, crispy-edge cousin of the classic burger patty. This Canadian-style guide will walk you through the art of making smash burger balls to perfection.
In this post, you’ll learn:
-
What makes smash burger balls unique
-
Tips for forming and smashing the balls
-
How to cook them on different surfaces
-
Topping ideas to level up your burgers
-
Storage tips and frequently asked questions
What Are Smash Burger Balls?
Unlike traditional patties that are shaped into flat rounds before cooking, smash burger balls are round balls of ground beef that get “smashed” onto a hot surface. This technique creates an ultra-crispy crust through the Maillard reaction, which enhances flavour and texture.
The result? A thin, flavour-packed burger with crispy edges and a juicy centre—ideal for stacking and perfect for grilling or stovetop cooking.
How to Form Smash Burger Balls
Forming the perfect burger ball is easy, but there are a few tricks:
Step 1: Measure
Use a kitchen scale to portion out 3 oz to 4 oz (85g to 113g) of ground beef per ball. Uniform size ensures even cooking.
Step 2: Handle lightly
Roll the beef into a ball with minimal pressure—don’t overwork the meat. Overhandling compresses the meat and can lead to dense burgers.
Step 3: Chill before cooking
Optional but helpful: refrigerate your balls for 15–30 minutes before smashing. This keeps them from sticking and helps maintain juiciness.
Smash Burger Balls Cooking Methods
You can cook smash burger balls on various surfaces, including:
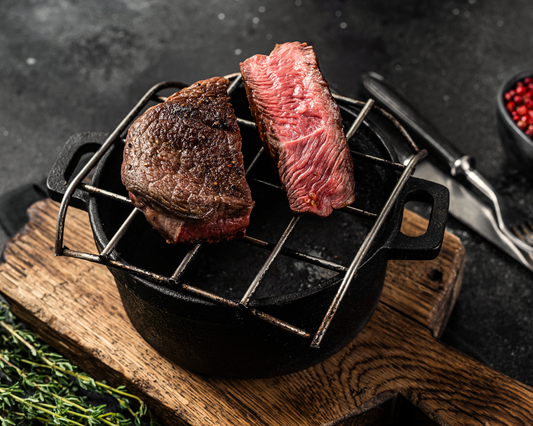
1. Cast Iron Skillet (Indoors or on Grill)
Cast iron retains heat well and gives burgers a beautiful crust.
-
Preheat the skillet until it’s screaming hot (around 400–450°F)
-
Place the beef ball on the skillet
-
Use a heavy-duty spatula or burger press to smash down firmly for 10 seconds
-
Season immediately with salt and pepper
-
Cook for 2–3 minutes, flip, then cook 1–2 minutes more
Tip: Use parchment paper between the spatula and beef to prevent sticking.
2. Flat Top Griddle or BBQ Griddle Plate
Ideal for making multiple smash burgers at once.
-
Heat the griddle on high until it reaches 400–450°F
-
Follow the same smashing and seasoning process
-
Avoid overcrowding—leave room for flipping and crust formation
3. Stovetop Non-Stick Pan (In a Pinch)
Less ideal, but still effective if you're craving smash burgers indoors.
-
Preheat over medium-high heat
-
Smash using a spatula with some force (avoid damaging non-stick coating)
-
Expect slightly less browning but still delicious results
Toppings and Serving Suggestions
Here’s how to elevate your smash burger experience:
Classic Combo:
-
American cheese (melts perfectly)
-
Pickles
-
Shredded iceberg lettuce
-
Tomato slices
-
Burger sauce (ketchup, mayo, mustard blend)
-
Toasted brioche or potato buns
Canadian Twist:
-
Smoked cheddar or maple cheddar
-
Back bacon or peameal bacon
-
Caramelized onions
-
Dijon or maple mustard
-
Montreal steak seasoning (instead of plain salt/pepper)
Double Smash Hack:
Make two smaller patties and stack them with cheese in between. You get extra crispy edges and an ideal meat-to-bun ratio.
Smash Burger Balls Tips & Tricks
-
Don’t smash after the initial press. Only smash once—pressing again removes juices and ruins the crust.
-
Use a burger press or two spatulas for even pressure.
-
Wipe excess grease between batches if needed to maintain a crispy surface.
-
Add cheese immediately after flipping so it melts just right.
-
Toasted buns are a must—they hold up better and add texture.
How to Make Smash Sauce
Smash sauce adds zing and creaminess. Here's a quick Canadian-style version:
Ingredients:
-
¼ cup mayo
-
1 tbsp ketchup
-
1 tbsp yellow mustard
-
1 tbsp finely chopped pickles or relish
-
1 tsp maple syrup (optional)
-
½ tsp smoked paprika
Mix and chill. Spread generously on both buns before assembling.
Storing & Reheating Smash Burgers
Storage:
-
Cooked patties can be stored in an airtight container in the fridge for up to 3 days
-
Reheat on a hot skillet for 1–2 minutes per side to revive crispiness
Freezing:
-
You can freeze raw burger balls for up to 3 months
-
Freeze on a tray, then transfer to a freezer bag
-
No need to thaw—smash from frozen on a preheated skillet (cook slightly longer)
Frequently Asked Questions
Q: Do I need to use parchment paper when smashing?
It’s not essential, but it prevents sticking and helps achieve a cleaner smash.
Q: Why are my burgers dry?
Likely causes: meat too lean, overcooked, or smashed too many times.
Q: What if I don’t have a burger press?
Use two metal spatulas or a heavy cast iron pan to press down.